Using donation buttons are the simplest and quickest way to begin monetizing a WordPress site. In this tutorial, I will show you how to use Stripe Payments to accept donations from your site easily.
If you want to accept donations via PayPal, then check out our accept PayPal donations tutorial.
Getting a Stripe account at stripe.com is quick and easy. Barring approval complications, it should take no more than 5 minutes to sign up, and activate your account. Compared to other payment processors, only a minimal amount of personal information is required. You will however, need a valid bank checking account, in order to successfully activate your Stripe account.
Once your Stripe account has been activated, download, install and activate the WordPress Stripe Payments plugin.
Stripe API Key Setup
Next, you will need to know what your Stripe API Keys are. You find out what your API Keys are by going to Account Settings, after you are logged into your Stripe Account, and then selecting the API Keys tab.
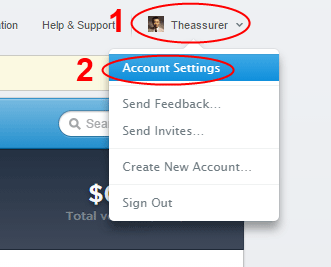
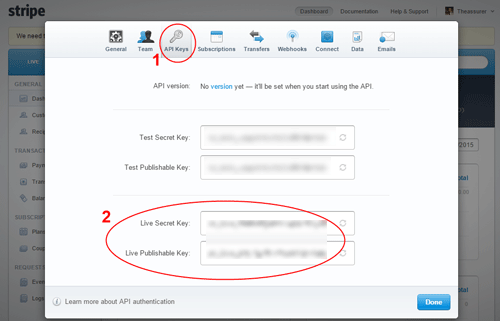
Your Stripe account has 2 sets of keys, a “Test” and a “Live” set. For our purposes, we are only concerned with the “Live†set of keys. Each set of keys contains a public “Publishable†key and a personal “Secret” key. It is important that you NEVER mixup or confuse your “Publishable” and your “Secret” keys.
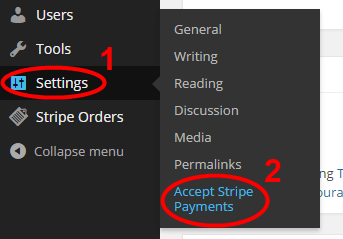
You’ll then copy your Live API Keys into the Credentials section of the Stripe plugin. When copying the keys from the Stripe API Keys tab, be careful not to copy trailing spaces when you select the key values. Accidental copy/paste of trailing spaces accounts for almost all API Key authentication errors. Also be careful not to mix-up and paste the wrong value into the plugin’s API Key fields.

Creating the Stripe Donation Button
At this point, you are now ready to create your first donation button on a post or page.
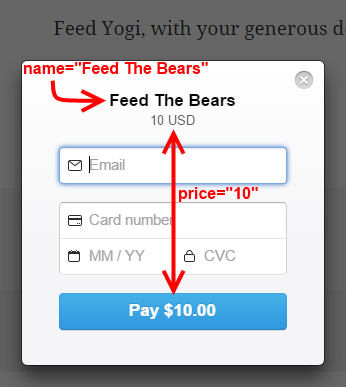
In this example, we are creating a $10 donation button, for the “Feed The Bears†cause. Our shortcode uses the following attributes:
- Name of our cause: name=”Feed The Bears”
- Quantity is non-applicable to donation buttons: quantity=”n/a”
- Price we are asking for: price=”10″
- Button text: button_text=”Donate Now”
Our completed shortcode would then look like this:
[accept_stripe_payment name="Feed The Bears" quantity="n/a" price="10" button_text="Donate Now"]

Because the shortcode only renders the actual donation button, you would need to precede the shortcode with your own donation pitch. This gives you the freedom to say whatever message you want to add just above or below the donation button.
Interacting with the Donation Button
Your visitors can now click on the donation button to send a donation to you.
When the button is clicked, a “Checkout” form appears as a screen overlay so the visitor can enter the credit card details and make the payment.
Multiple Donation Buttons
Create a few buttons for various different donation amount (example: $5, $10, $20, $50 etc). Then you can put all these buttons next to one another so your visitors can pick an amount and pay.
When using multiple buttons on a page, make sure to use different value for the “name” parameter of the shortcode to make them unique. The plugin uses the “name” parameter’s value to identify the button on the page. If you have multiple buttons with exactly the same name then it can’t figure out which particular button is being clicked.
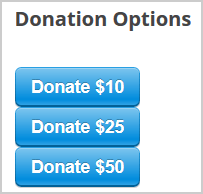
In the button text, specify the donation amount (example: Donate $20) so the visitor knows which button to click. Below is an example showing how it looks:
Allow the Visitor to Specify a Custom Donation Amount
You can also create a Stripe donation button where the visitors can enter how much they want to donate.
Use zero (0) as the value of the “price” parameter in the stripe payments shortcode to allow the visitors to enter a custom amount.
Below is an example shortcode:
[accept_stripe_payment price="0" name="Test donation for a good cause" button_text="Donate Custom Amount"]
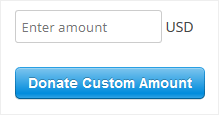
It will create a donation button where the user can enter the donation amount similar to the example shown below:
Customize the Charge Description in the Stripe Popup
You can use the “description” parameter in the shortcode to customize the description that shows up in the Stripe payment popup window.
Below is an example shortcode:
[accept_stripe_payment price="0" name="Another test donation" button_text="Donate" description="This is a custom description that will show in the payment window"]
@Belinda, Yes. Edit the Stripe product in question then enable the “Collect Address on Checkout” field.
Is there a parameter I can set to collect contact information from the user?
@Heather, I see no issue with asking people to contribute even if you aren’t a non-profit. Put all the details out there then your visitors can make an informed decision to contribute or not. Nothing wrong with that.
There seems to be some question about whether it’s OK to use the word ‘DONATE’ on a site that isn’t a non-profit. If you are an individual with a personal website and you are asking people to contribute to support your site, is this ok? Does anyone have some experience with this?
@Andy, In your case just remove the quantity parameter altogether from the shortcode.
[accept_stripe_payment name=”$5 – Thank you” quantity=”n/a” price=”5″ button_text=”Donate $5.00″]
@Andy, What is the full shortcode that you are using?
Hi,
Thanks for the plugin. I’m trying to accept donations and have set quantity=”n/a” as advised but in the pop-up overlay, it shows ‘NA pieces for 5 USD’ which doesn’t make much sense for a donation. I would prefer if it just said ‘5 USD’ as advised. Am I doing something wrong? Thanks again.
@Msol, I have added the tip in the page.
It would be great to add to the instructions the tip of assigning different NAMES to the different amount donation buttons. I ended up losing several hours trying to figure out why my $2 button was charging $10! Thanks anyway for a great plugin.
This plugin can only save the card when a full transaction is done.
Is it possible to only create a customer but not actually charge them? It says there is an option to save the card in Stripe, but is it possible to do that without charging them? (and then of course charge them later from Stripe)
It is not possible to do that by charging them “0”, because that just creates a box for them to enter the amount themselves, right?
Thank you in advance!
@Steve, That message is only shown if it is a digital item. So if you specify a “url” value in the shortcode it will assume that it is a digital item and then allow users to download that item after the payment. If you leave that parameter empty in the shortcode then it will assume that this is a non-downloadable item and it won’t show that message.
Can I change the “Please click here to download” message on the default checkout message – I want to offer a service not a product download?
@Nates, This plugin doesn’t do recurring at the moment. You can maybe take a look at our WP eStore plugin which has Stripe recurring payments option.
Hi
Is there a way to have recurring payments?
@Duncan, You can have as many donation payment box as you want to. Remember to change the value of the “name” field to make them different. Different items are suppose to have different names. If you use the same name for all your payment box then the plugin won’t be able to recognize the difference.
Can you have only one payment ‘block’ per site?
@onastvar, You can create a few donation buttons with various pre-configured amount. Then your visitors can pick one option. This plugin doesn’t haven’t option for the visitors to enter the donation amount.
Hello,
Thanks for the “HowTo”. One question: Is it possible and would you be able to share how could I setup this up so that the end user enters the amount of donation instead of predetermined amount?