You have decided it is time to start monetizing your website but don’t know where to start. There are many eCommerce solutions on the market although the majority of these come with high ongoing fees or alternatively an initial lump sum cost. Many people have heard of using PayPal to accept payments in exchange for goods or services but have you considered using Stripe? Your customers can pay using a credit card for your products and services. The transaction is processed by Stripe.
Stripe is one of the best payment gateways to accept credit card for an online business and is currently serving businesses in 25 countries around the world. If you decide Stripe is the perfect payment platform to use on your website, this article will help you set up a simple online store from start to finish for free. Alternatively, if you decide to use PayPal to accept payments from your customers, click here for tips on setting up an online store using PayPal.
Creating an Online Store for Free
You’ve decided that the Stripe payment gateway to accept credit card is the right choice for your online business. Whether you are currently running a blog or have just began setting up a WordPress website from scratch, the Stripe Payments plugin will allow you to accept payments from your customers in exchange for goods or services.
Video Tutorial
What is the Stripe Payments Plugin?
The Stripe Payments plugin is a free eCommerce solution for WordPress that gives anyone the ability to sell simple products or services from their sites. It is a light weight plugin that has all the features needed to operate a simple online store. This free plugin gives you the ability to create ‘Buy Now’ buttons for any products or services you wish to offer and then accept all payments using credit cards (the credit card payment is processed by the Stripe payment gateway).
Features of the Stripe Payments Plugin
- Free and easy to install
- A quick and easy checkout process where you can accept credit card payments from your customers
- The ability to sell digital media products from your website
- The option to collect billing and shipping information when selling physical products
- The ability to accept donations (for example, if you are creating a charity website)
- A shortcode inserter that allows you to input short codes easily in any post/page on your site
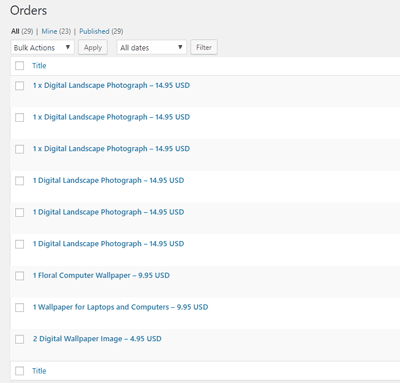
- An orders menu where you can view everything that has been sold
- The option to customize the payment button text
- Automatically sends a receipt to your customers
- Collect a simple question from your customers when they checkout
- A shop page that you can add to your WordPress menu
The Stripe Payments plugin is perfect for business owners that intend on selling simple products to their customers. Each product has a separate payment button that lets the customers purchase the item quickly using a credit card.
Uses of the Stripe Payments Plugin
Selling Physical Products
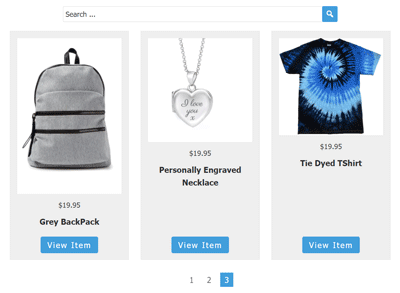
Using this plugin you can create a shop page similar to the one below. Your customers can use the search bar to find a specific product. You can allow your customers to specify the quantity they would like to purchase, otherwise you can specify a set quantity.
Selling Digital Products
The Stripe plugin gives you the ability to also sell digital products from your website. After your customer purchases a digital product, they will be given a product download link.

Stripe Payments Popup Checkout Window
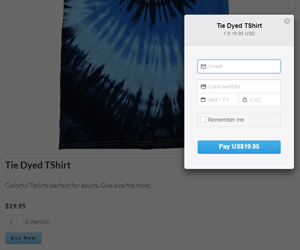
When a customer clicks on a ‘Buy Now’ button for any of your products/services, they will be shown the Stripe popup checkout window. This is where your customers will enter the credit card details and finalize the purchase.
Creating and Selling a Products
You have a WordPress website and you are ready to start selling products or services.
In this scenario, a woman has been writing a blog about multiple dog breeds for sometime. She has decided that she now has enough traffic to start monetizing her site. She would like to sell three different dog bowls. The following steps will outline how she could create one of her three products:
Step 1) Install and activate the Stripe Payments plugin.
Step 2) Ensure you have created a Stripe account and configured the basic general settings required.
Step 3) Under the ‘Stripe Payments’ menu, click the ‘Add New Product’ button.
Step 4) Give your product a title, description (if you choose) and a price.
Step 5) Choose a set quantity or allow your customers to specify a quantity.
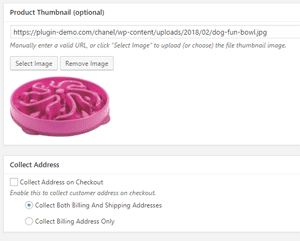
Step 6) If you are selling a digital product select the appropriate file. In this scenario, she is selling a physical product so she would choose to collect billing and shipping information instead.
Step 7) Add a product thumbnail (if you choose).
Step 8) Customize the button text (if you choose). By default, the button text will read ‘Buy Now’.
Step 9) Publish the product you have created. This product will now appear on your shop page. You can use the shortcode inserter to display your product on any post or page on your site (see information below).
Add the Products You Create to Any Post or Page
Once you create a product using the Stripe Payments plugin, you can then display this product on any post or page. This works well if you have a landing page and would like to promote your product at the top or bottom. This feature allows you to promote your products from pages that receive high volumes of traffic.
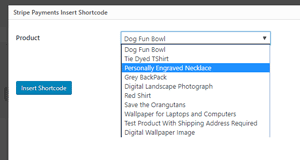
Use the shortcode inserter to select the product you wish to sell off that post/page.

The Ability to Easily View Customer Orders
Admin can view all orders and further customer details. If you choose to collect shipping/billing details all this information can be found by clicking on a specific customer order.
That finalises the documentation on how you can create an online store for free. To find out more and to download the Stripe Payments plugin (for free) click here.
Leave a Reply