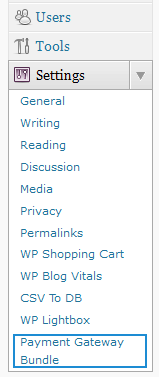
After you install the WP Payment Gateway Bundle plugin you will need to configure some Sagepay specific settings in the plugin and in your Sagepay merchant profile account. You can find the Sagepay specific settings under the “Gateway Settings†tab when you go to the payment gateway bundle plugin’s settings menu. The following screenshot shows how you can access the settings page of this plugin:
In order to complete the Sagepay profile settings simply follow the steps outlined below so after a payment, Sagepay can send payment notification to the plugin for post payment processing.

SagePay Setup Settings
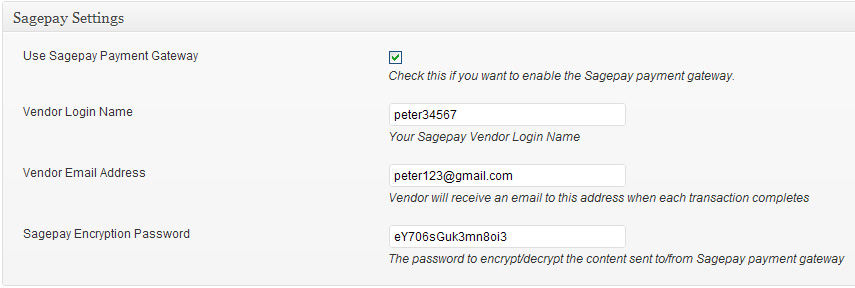
Step 1: Check the “Use Sagepay Payment Gateway†option from the Sagepay Settings section.
Step 2: Enter your Sagepay Vendor Login Name
Step 3: Enter the email address where you want to receive the confirmation email after a successful transaction
Step 4: Enter your Sagepay encryption password.
Note: A unique Vendor name and encryption password are provided when Sage Pay creates an account for you. This data is emailed to the person registered on the account. Please email [email protected] if you need to retrieve your password.
Step 5: Hit the “Update†button at the bottom to save the settings and now you are ready to use Sagepay with the WP Payment Gateway Bundle Plugin.
Note: We provide technical support for our premium plugins via our customer only support forum
