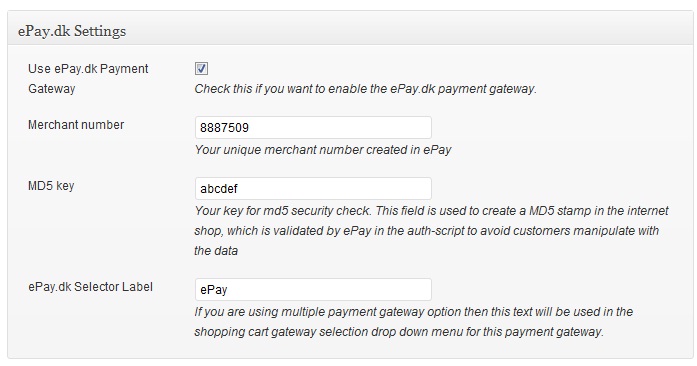
After you install the WP Payment Gateway Bundle plugin you will need to configure some ePay.dk specific settings in the plugin and in your ePay.dk merchant profile account. You can find the ePay specific settings under the “Gateway Settings†tab when you go to the payment gateway bundle plugin’s settings menu. The following screenshot shows how you can access the settings page of this plugin:
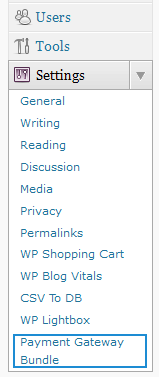
Payment Gateway Bundle Plugin Settings
In order to complete the ePay.dk profile settings simply follow the steps outlined below so after a payment, ePay can send payment notification to the plugin for post payment processing.
Step 1: Log in to your ePay.dk merchant account. Click Payment system under Settings.
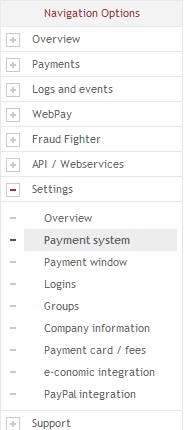
Step 2: Copy your merchant number to a text file (you will need it to enter in the payment gateway bundle settings). Enter your domain name in the Domain(s) filed (where you will be using payment gateway bundle plugin). Click “Update settings for domainsâ€.
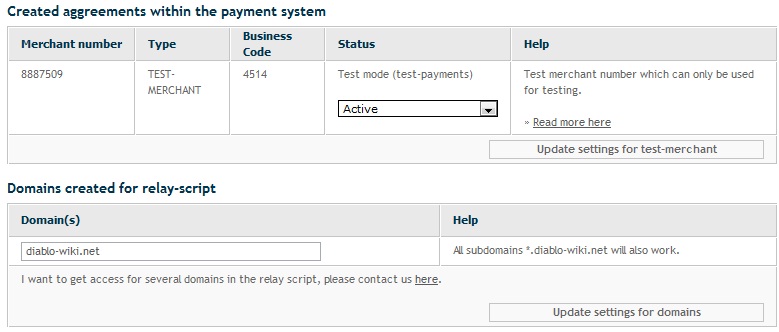
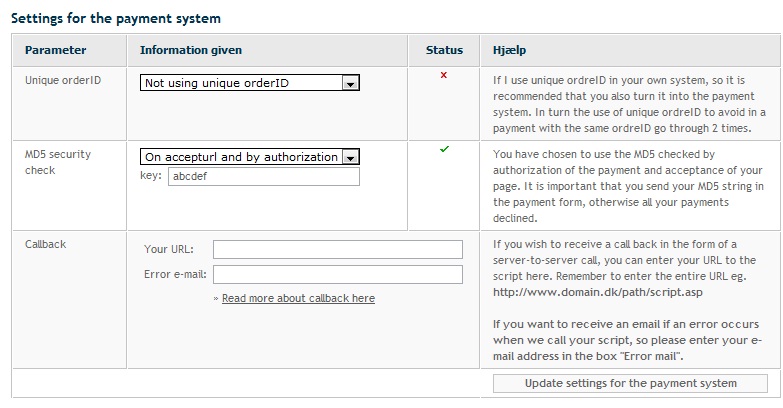
Step 3: Enter a key for MD5 security check (Don’t forget to copy this to a text file. You will need to enter it in the payment gateway bundle settings) and select “On accepturl and by authorization†option. Click “Update settings for the payment systemâ€.
Step 4: Now go to ePay.dk Settings (under Payment Gateway Bundle->Gateway Settings) and check “Use ePay.dk Payment Gateway†option.
Step 5: Enter your epay.dk merchant number.
Step 6: Enter your MD5 key created in epay.dk.
Step 7: Enter a selector Label for ePay.dk (This text will be displayed in the select box if a customer chooses ePay.dk for checkout).
Step 8: Hit the “Update†button at the bottom to save the settings and now you are ready to use ePay.dk with the WP Payment Gateway Bundle Plugin.
Note: We provide technical support for our premium plugins via our customer only support forum
