After you install the WP Payment Gateway Bundle plugin you will need to configure some Verotel specific settings in the plugin and in your Verotel merchant profile account. You can find the Verotel specific settings under the “Gateway Settings†tab when you go to the payment gateway bundle plugin’s settings menu. The following screenshot shows how you can access the settings page of this plugin:
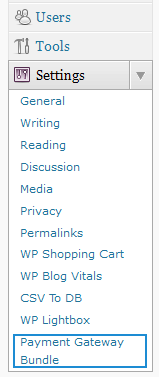
Payment Gateway Bundle Plugin Settings
In order to complete the Verotel profile settings simply follow the steps outlined below so after a payment, Verotel can send payment notification to the plugin for post payment processing.
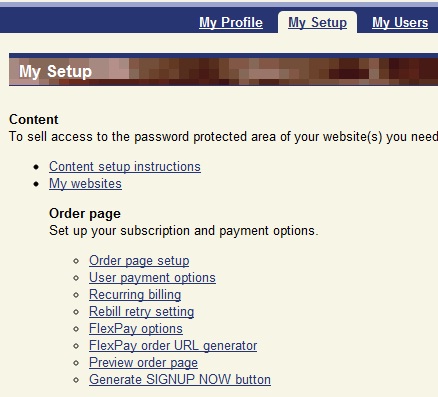
Step 1: Log in to your Verotel Merchant account go to My Setup tab. Click FlexPay options (under Order page)
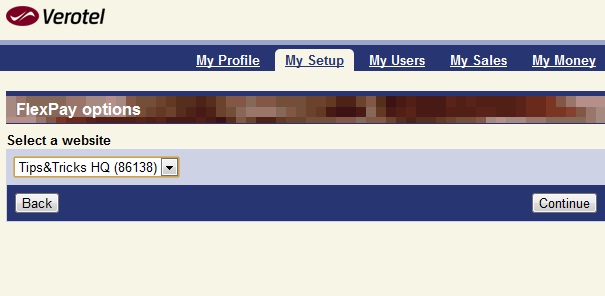
Step 2:Â Select the website you want to configure this option for (Copy the shopID associated with the website to a text file. you will need to enter this in the payment gateway bundle settings). Click Continue
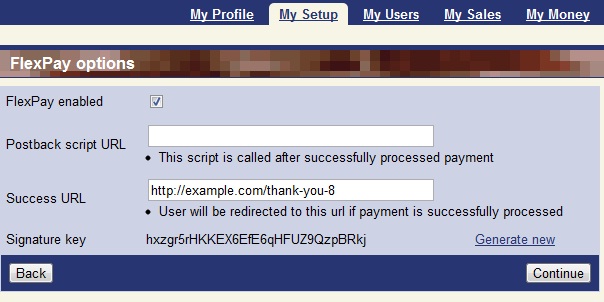
Step 3: Check FlexPay enabled option. Enter a URL in the Success URL field (Your customer will be redirected to this URL after a successful payment). A signature key should be automatically generated for you (you will need to enter this signature key in the payment gateway bundle settings. So copy this to a text file).
Click Continue to save the settings.
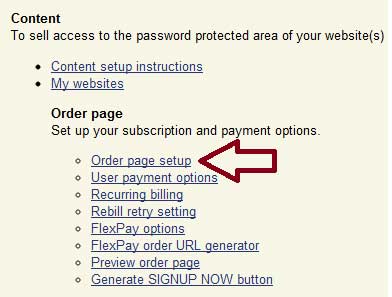
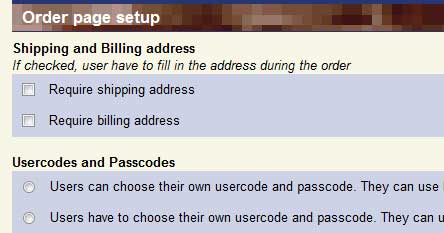
Step 4: Go to My Setup tab again and click Order page setup.
Step 5: Select your website and click Continue. As you can see that there are options for you to customize the order page. By default the order page doesn’t collect any billing or shipping details from the user. But you can set it so the user needs to fills them in during checkout. You at least need to have the Require billing address option checked for the payment to be successfully processed. You can leave the rest of the options to their default values for now.
Note:Â If the user chooses United States as the country an additional State option is also displayed on the verotel order page. If the user is not from US there won’t be any option to select the state. In that case the plugin will set the user’s state value as undefined.
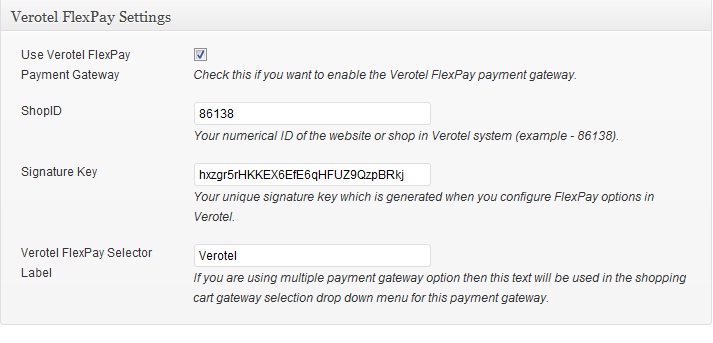
Step 6: Now go to Verotel FlexPay Settings (under Payment Gateway Bundle->Gateway Settings) and Check the “Use Verotel FlexPay Payment Gateway†option.
Step 7: Enter your ShopID
Step 8: Enter your Signature Key
Step 9: Enter a selector Label for Verotel FlexPay (This text will be displayed in the select box if a customer chooses Verotel FlexPay for checkout)
Step 10: Hit the “Update†button at the bottom to save the settings and now you are ready to use Verotel FlexPay Checkout with the WP Payment Gateway Bundle addon.
Note: We provide technical support for our premium plugins via our customer only support forum
