Stripe Plugin allows you to accept payments from your WordPress site via Stripe payment gateway. You can sell your products or services via Stripe using this plugin. The users will be able to pay using their credit cards without leaving your website.
The plugin creates a user-friendly orders menu where you can check details of each payment received.
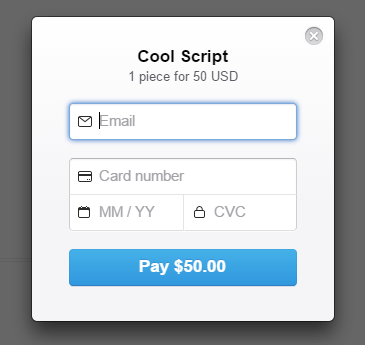
You can accept donations via stripe payment gateway using this plugin too.
Download the WordPress Stripe Plugin
Compatibility
Works with the latest version of WordPress.
Requires
Requires WordPress 4.7Â or higher.
WordPress Stripe Plugin Installation
- Go to the Add New plugins screen in your WordPress admin area
- Click the upload tab
- Browse for the plugin file (stripe-payments.zip)
- Click Install Now and then activate the plugin
WordPress Stripe Plugin Usage
Please visit our Stripe payments plugin site for updated usage instructions for this plugin.
Setup and Shortcode Usage Video
Stripe Checkout Demo and Testing Video
Written Usage Instructions
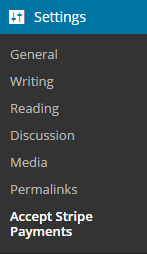
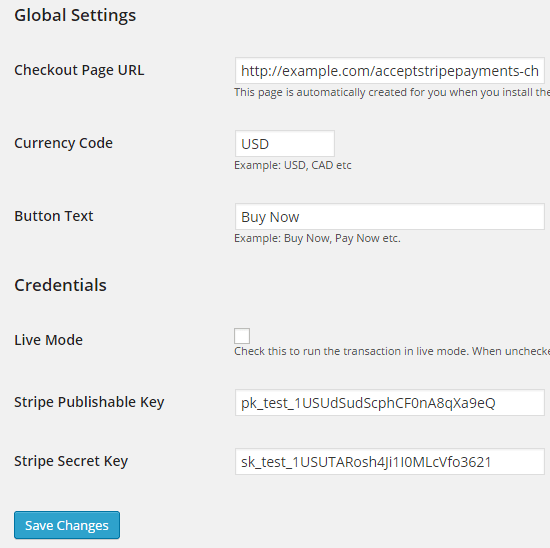
Step 1)Â Go to the Settings menu of the Stripe plugin and configure your API credentials.
Step 2)Â Insert the Stripe plugin shortcode into a post/page to create a Buy button.
[accept_stripe_payment name="Cool Script" price="50" url="http://example.com/downloads/my-script.zip" button_text="Buy Now"]
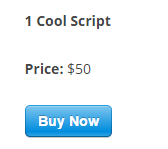
When a user clicks on the “Buy Now” button the payment window will automatically pop up.

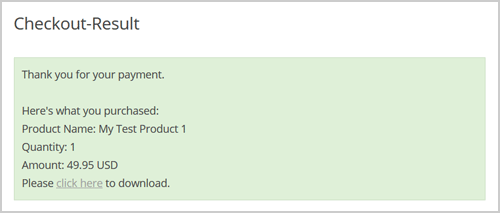
Step 3) Your customers will be redirected to the “Checkout Result” page after the credit card payment. They will receive a nice payment confirmation message like the following in this page:

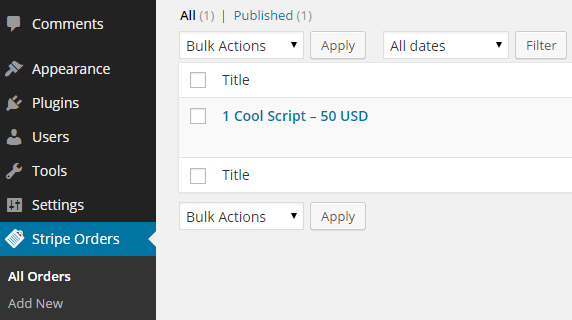
Step 4)Â You can view all the payments that you have received from your WordPress admin dashboard (by going to the Stripe Orders menu).
Customizing the Checkout Result Page
Your customers get sent to the “Checkout Result” page after they make a payment. It shows a simple thank you message and allows the customer to download digital items (if any).
You can add more messages to this page by editing this page from your WordPress admin dashboard. Add your message above or below the existing shortcode of that page (keep the shortcode as is). See example below:

Collecting Shipping and Billing Address
You can collect shipping and billing address during the transaction also. You need to specify the following two parameters in the stripe payments shortcodes to collect the address data.
- billing_address=”1″
- shipping_address=”1″
Below is an example of how to use it in the shortcode:
[accept_stripe_payment name="Cool Script" price="50" button_text="Buy Now" billing_address="1" shipping_address="1"]
It will prompt the customers for the billing and shipping address as shown in the following screenshot:
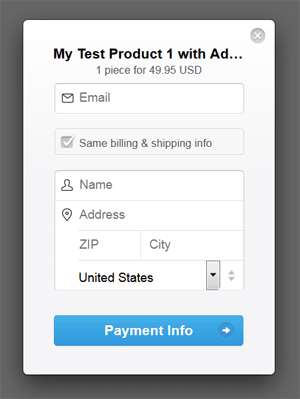
When these parameters are enabled, the stripe order details in the admin dashboard will show the customer’s billing and shipping address for the transaction.
Specifying a Custom Quantity for the Item
You can optionally add quantity for the item/product that you want to sell. Use the “quantity” parameter in the shortcode. See example shortcode below:
[accept_stripe_payment name="Cool Product" price="25.00" button_text="Pay Now" quantity="3"]
You can create multiple Stripe buttons with different quantities and put them on your landing page.
Adding a Logo to the Stripe Payment Window
You can optionally show an item logo in the Stripe payment window. Specify the logo image URL using the “item_logo” parameter in the shortcode. See example below:
[accept_stripe_payment name="Cool Product" price="25.00" button_text="Pay Now" item_logo="https://your-domain.com/product-logo.png"]
Adding a Custom Description for the Item
You can optionally add a custom description for the item/product/service that will get shown in the stripe checkout/payment window of the item. Specify the description using the “description” parameter in the shortcode. See example shortcode below:
[accept_stripe_payment name="Cool Product" price="25.00" button_text="Pay Now" description="This is a test item description"]
Specifying a Currency Code in the Shortcode
You can optionally specify a currency code in the shortcode to accept payment in a different currency than the one you configured in the settings. This allows you to create different buttons that charge money in different currencies. See example shortcode below:
[accept_stripe_payment name="Cool Product" price="25.00" button_text="Pay Now" currency="USD"]
You can find a list of supported currency codes from Stripe’s site.
Specifying a Language for the Stripe Checkout Pop-up
Stripe can show the checkout popup in a few different languages. You can set the language by going to the settings menu of this plugin and selecting an option from the “Stripe Checkout Language” drop-down field.
Customize the Buy Button Styles
Read the customizing Stripe buy button styles tutorial.
Accepting Donations Using this Plugin.
You can use this plugin to accept donation for a cause via Stripe gateway also. Read the accepting stripe donations tutorial to learn more on that.
Check our WordPress plugins page for more cool WordPress plugins.