If you have just installed the Payment Gateway Bundle Addon for the first time, this guide will help you set up your site so it’s ready to accept payment via one of your preferred payment gateways.
The Payment Gateway Bundle is an Addon for the WP eStore plugin. So before you move on to the Payment Gateway Bundle setup you need to make sure that you are familiar with WP eStore plugin configuration. Here is what you need to do:
Step 1
Watch the eStore’s basic setup video tutorials and complete the required setup of the plugin so you can start selling (Ignore this step if you have done this already).
Step 2
Once you have configured WP eStore plugin, created a product, placed an “Add to Cart” button on your site, you can go to the next step.
Step 3
Install the WP Payment Gateway Bundle Addon (if you haven’t installed it already).
- Go to the Add New plugins screen in your WordPress admin area
- Click the upload tab
- Browse for the plugin file (wp-payment-gateway.zip)
- Click Install Now and then activate the plugin
Step 4
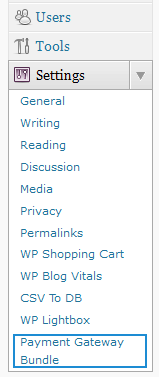
Go to Settings > Payment Gateway Bundle interface from your WordPress admin dashboard.

Step 5
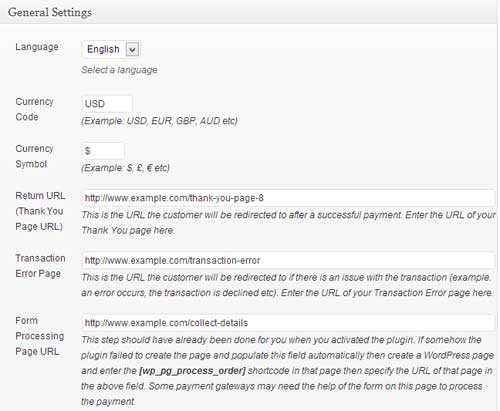
Configure and save the general settings of the Payment Gateway Bundle extension. The general settings page has two sections:
a) General Settings
This section allows you to set your language, currency code, currency symbol etc.
Also, there are some pages that automatically gets created for you when you first install the addon (simply check the settings and verify that a URL value exists in the field in question):
- Return URL: The Page where your users will be redirected to after a successful transaction. You can also use this page to deliver digital downloads to your customers after the transaction.
- Transaction Error Page: The page where your users will be redirected to if there is an issue with the transaction.
- Form Processing Page URL: The page where your users fill up the details before they make the payment.
Please make sure that none of the fields are empty. If a page didn’t get created for some reason, you should read the help text for the field and create the page manually.

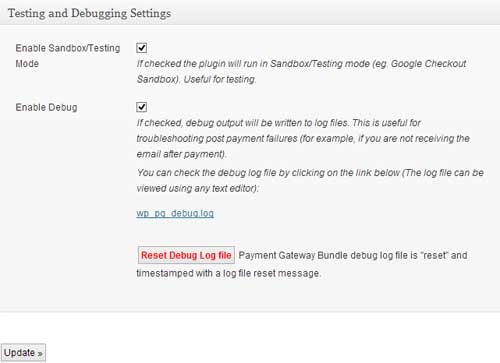
b) Testing and Debugging Settings
This section allows you to run a transaction in test mode (if you need).
There is also a debug option. You can enable this to track every step of a user’s transaction (This can help you quickly identify a transaction failure and why it happened). You should keep this option enabled if you are having an issue with getting the plugin to work correctly.
Hit the Update button to save the changes.
Step 6
Switch to the Gateway Settings tab at the top of the page.
![]()
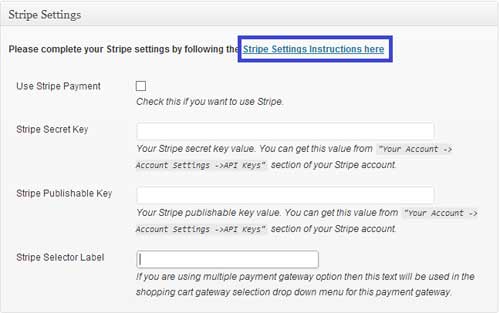
This is where you can fill up the API details specific to the payment gateway you want to use.
We have documentation that explains how to setup each payment gateway supported by the Payment Gateway Bundle addon. Please make sure to check the gateway specific documentation (marked blue in the screenshot below) before you enter any information.

Click the Update button to save the settings.
Step 7
Read this documentation to learn how to setup the WP eStore plugin to use ONE payment gateway or show a selection of multiple gateways (the ones that you have enabled).
If you show multiple gateways, your customers will be able to choose the checkout option they want to use.
Note: We provide technical support for our premium plugins via our customer only support forum
