The following video will give you a basic introduction of PayPal Payments Advanced and the requirements for the integration.
After you install the WP Payment Gateway Bundle plugin you will need to configure some PayPal Payments Advanced specific settings in the plugin and in your PayPal Manager Merchant account. This will allow you to accept payments using one of the hosted checkout templates.
You can find the PayPal Payments Advanced Checkout specific settings under the “Gateway Settings†tab when you go to the payment gateway bundle plugin’s settings menu. The following screenshot shows how you can access the settings page of this plugin:
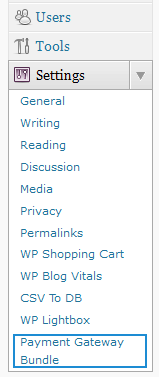
Payment Gateway Bundle Plugin Settings
In order to complete the PayPal Payments Advanced settings simply follow the steps outlined below:
Step 1: Check the “Use PayPal Payments Advanced Gateway” checkbox from the “PayPal Payments Advanced Settings” section of the plugin.
Step 2: Fill in the API details. There are four pieces of API information that you need to enter in the settings so the plugin can process the payment using PayPal Payments Advanced:
- Partner
- Vendor
- User
- Password
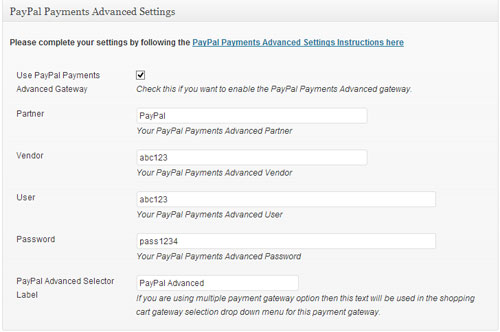
These are basically the api credentials that you use to login to your PayPal Manager account.
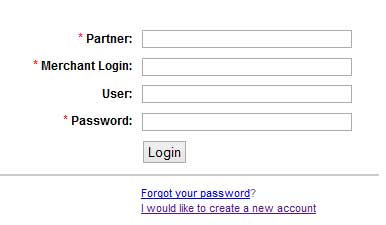
If you don’t have an account yet you can create one by following the “I would like to create a new account” link.
Step 3:Â Once you have logged into your paypal manager account switch to the Service Settings tab.
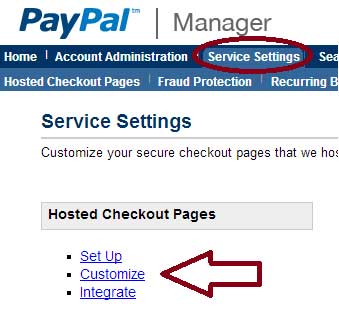
This is where you will be able to customise the settings and the layout for your hosted checkout page. First, click on the Set up option.
Step 4: The Set up tab contains most of your settings. The default options are fine. So I’m just going to walk you through some of the major options.
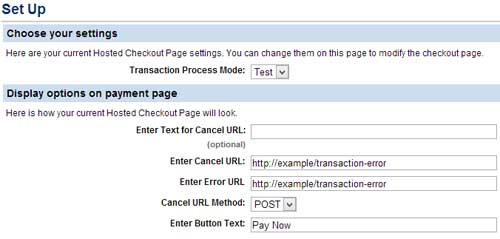
If you are going to run some testing before you go live make sure to set the Transaction Process Mode to “Test”. Otherwise it should be set to “Live”.
Enter a URL where the user will be redirected to upon cancellation or if an error occurs. You can just copy the value of Transaction Error Page (under Settings->Payment Gateway Bundle->General Settings)Â and paste it here for now.
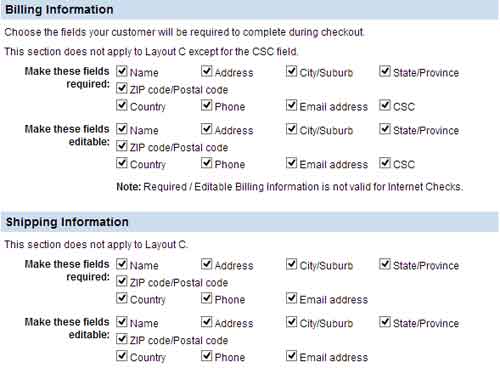
Step 5: Move on to the Billing & Shipping info sections. You can just check the fields that you would like a user to fill out (or check everything so you can get all the information).
Step 6: Now is the important part which is the Payment Confirmation Section. This is where you need to specify how your website will receive the payment notification.

Make sure that you have set the options to the following:
- Show Confirmation page: Â On my website
- Enter Return URL: the return url specified in the eStore settings (WP eStore->Settings->General Settings->General Image and Page URL Settings->Return URL)
- Return URL Method: Post
Step 7: In the Security Options section select Enable Secure Token: Yes.
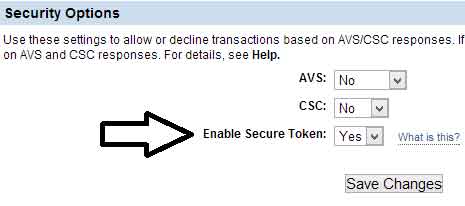
Click on the Save Changes button to update your settings.
That’s pretty much it. There is still one thing that you need to do. Go back to the top of the page and select the Customize option.
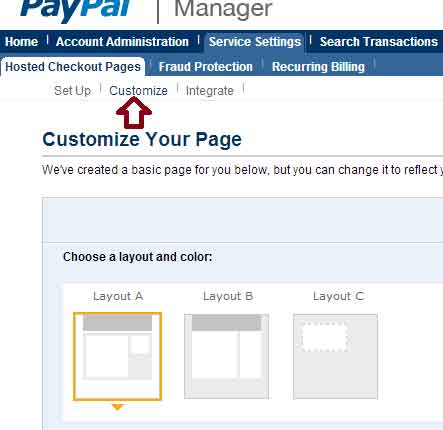
Select Layout A. Currently the gateway bundle addon is integrated with Layout A (since it gives a merchant the flexibility of customizing the checkout form with billing & shipping information). We plan to integrate the other two layout options in future.
Click on the Save and Publish button at the bottom of the page to update your settings.
Now your website is ready to accept payments using PayPal Payments Advanced.
Note: We provide technical support for our premium plugins via our customer only support forum