I have had a few requests from some of the users of the WordPress eStore plugin (to Sell digital content from your blog securely) to write up a step by step startup guide so they can be up and running and selling their products in less than five minutes… So here it is.
If you prefer a video tutorial then take a look at the WP eStore quick installation and usage video tutorial
Before you dive into playing around with all the various settings of the WP eStore plugin, I recommend getting up and running first by following the simple startup steps outlined below.
Step 1. Once you get the product download link in your email go ahead and download the zip file.
Step 2. Go to plugins menu in your WP admin dashboard and click the “Add New” link. Click on the “upload” tab and then upload the zip file you downloaded in step 1.
Step 3. Activate the plugin through the Plugins menu in WordPress.
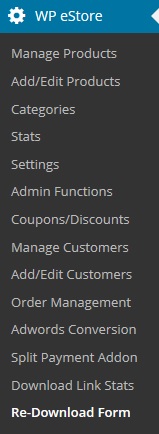
Step 4. After you activate the WordPress eStore Plugin, the settings/options menu can be found on the left hand side menu similar to the following screenshot:

Step 5. First go to the ‘Settings’ menu and configure the general, email and digital product delivery options.
- Most of the default settings should be enough to get you going but you may want to customize a few things.
- Make sure to change the ‘Random Code’ to something hard to guess.
Step 6. Now go to the ‘Add/Edit Products’ menu.
- Fill in the Product name and product price fields.
- Now fill in the URL of the actual product file URL in the “Digital Product Download URL” field if this is a digital product.
- example, http://www.your-domain.com/products/ebooks/awesome_ebook.zip (Buyers will get an encrypted version of this link so they will never see/know this URL)
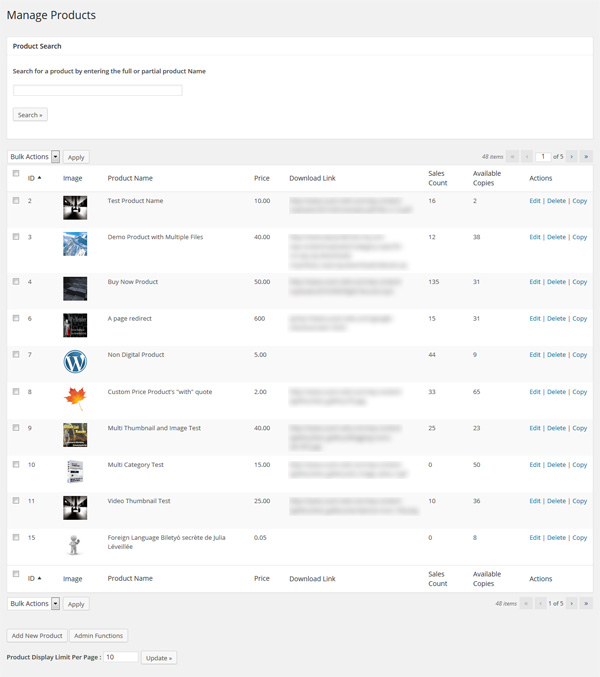
Step 7. Go to the ‘Manage Products’ menu and this page will show you a list of all the existing products you have. To edit a product just click on the edit link for the corresponding product. Take note of the Product IDs in the “ID” column of this list. You will need this product id to display an “add to cart” button on your site that corresponds to this product.

Step 8. Now just enter the following shortcode (trigger text) where you want to show the “add to cart” button to sell the product you just configured (assuming the product id of the product is 1)
[wp_eStore_add_to_cart id=1]
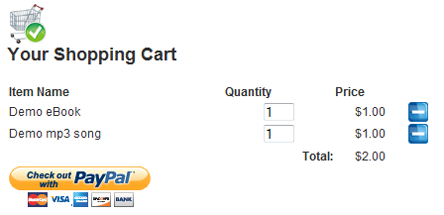
Step 9. Add one of the following shortcodes for the shopping cart where you want it to appear (in the post and/or on a checkout page). You can use the widget too to show the shopping cart on the sidebar.
[wp_eStore_cart_when_not_empty]
or
[wp_eStore_cart]
The first shortcode is useful when you want to show the shopping cart only when there are items in the cart (example, in a post). The 2nd shortcode always shows the shopping cart (useful on a checkout page).
Now just sit back and see those sales come through and in your spare time browse the WP eStore documentation site to learn all the cool things you can do with this plugin 🙂

Useful Related Resources
All WP eStore related documentation can be found on the WP eStore Documentation Site.
- WP eStore quick installation and usage video tutorial
- eCommerce Knowledge base
- WP eStore Installation & Upgrade Instructions
- Testing the WP eStore plugin
- Configuring a Buy now type button
The WordPress eStore plugin can be found here.
Really nice job, folks! It took about an hour to get a product up (not five minutes), but it was very easy. Everything works as advertised.
Hi there
I’m wondering if you guys use mod_xsendfile to handle the files.
Bingo! That does the trick.
Hi Rob, I believe this is what you are looking for:
https://www.tipsandtricks-hq.com/ecommerce/how-to-allow-customers-to-specify-a-price-for-a-product-994
Please let me know if this is not what you are looking for.
Hi —
Is there a way to leave the price field user specified? While I am mostly using the plugin for pre-priced digital content, I would also like to have an option where a price can be entered manually — to pay against services.
Thanks!
Hi, The files can be hosted anywhere you want as long as the eStore can access them. This means no password protection, hidden behind a firewall and so on.
Hi,
I use Amazon web services storage and just want to make sure my products can sit there (rather than on my website) and still be accessed via the shopping cart? I didn’t see mention of using a download URL other than one from on your actual website.
Thanks
B
Hi Adam, The checkout process is handled by the Payment gateway (example: PayPal). Since PayPal is handling the transaction you do not need a SSL. The transactions is not processed though your site. You only need a SSL when you accept payments (mainly credit card payments) directly on your site.