This documentation is old and has been deprecated. It should not be used anymore. Use the new documentation for WP eMember and AWeber integration.
Before AWeber introduced their API, they only supported 3rd party integration using email parsers. This documentation explains how to integrate eMember using AWeber’s email parser method.
Step 1: Create an Email Parser
AWeber use email parsers in situations where you want subscribers to add to your list via an email from a third party, typically a payment processor, rather than the subscriber sending an email directly from their email program.
To add a new custom email parser select “Email Parser” from the “My Lists” menu and choose “Add New” from the “Custom Parsers” section.
- My List -> Email Parser
- Custom Parsers -> Add New
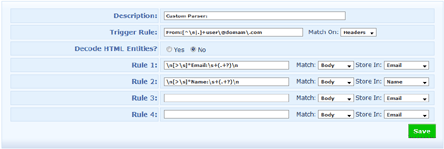
The new email parser configuration will look similar to the following (Click to enlarge)
There are only two fields (Description and Trigger Rule) that need changing here.
- Give a description for this parser, eg. eMember Parser
- In the Trigger Rule field, replace the “user\@domain\.com” with the email address that you have specified in the “From Email Address” field in the eMember’s email settings menu (This step is also very important).
- If you have multiple lists in your account then edit the parser you just created then check the “Enable parser for all lists in this account” checkbox and save it (This step is also very important). Enabling this option will not harm any of your other lists… all it does is that it activates this parser so it can filter signup request from eStore and assigns the contact to the correct list.
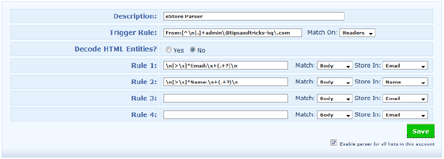
For example, the email address I have specified in my “From Email Address” field is “superadmin@tipsandtricks-hq.com so I need to replace:
with
Below is a screenshot of my email parser (click to enlarge):
Adding an Email Parser is really simple but even a small error can throw everything off.
Step 2: Configure the WP eMember’s Autoresponder Settings
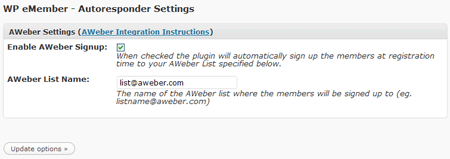
Now all you need to do is specify the AWeber list name that you want your customers to be signed up to and enable AWeber Signup.


Leave a Reply