A trial period allows your customers to view protected content on your site for free. The time frame of the trial period is entirely up to you, some opting to create a trial period that lasts a few days, while others wish to offer their customers a trial that lasts a few weeks. A free trial period allows your customers to test run the membership you offer without having to pay.
This documentation will outline the two ways to offer a free trial period to your customers:
- Option 1: Providing your customers with a free period prior to charging them for a membership (using a subscription button)
- Option 2: Offering a trial period for free with no further cost (customers will have to choose to sign up as a paid member)
Why Offer a Trial Period?
Offering a trial period to your customers allows them to get a taste of what having a paid membership would be like. If your customers like the content you are providing in their trial period, it will entice them to sign up for a paid membership.
Option 1: Creating a Free Period Prior to a Subscription Membership
This option allows you to offer a free trial period attached to a subscription membership. For example, I would like to offer my customers 2 weeks free before recurring payments are deducted from their PayPal account.
- Create a ‘Membership Level’ for the subscription you will offer (more details on creating a membership level here). You may wish to title this membership level ‘Gold Subscriber’ or ‘Silver Subscriber’.
- Now that you have created your membership level, click on the ‘Payments’ menu under the ‘WP eMember’ plugin.
- Select the ‘Create New Button’ tab. Choose the ‘PayPal Subscription’ option.
- Give the button a title and select the membership level you created from the drop down menu.
- Enter in your PayPal email address and choose the billing cycle and count you would like to associate with this subscription. This billing cycle will begin after the free trial period has ended.
- Under the ‘Trial Billing Details’ section is where you will enter in the details that relate to the ‘free trial period’. For a free trial period, enter ‘0’ in the ‘Trial Billing Amount’ field.
- In the ‘Trial Billing Period’ field, enter in the length of the trial period you will offer (for example, 10 days). Your customers will not be charged for this period.
- ‘Save Payment Data’.

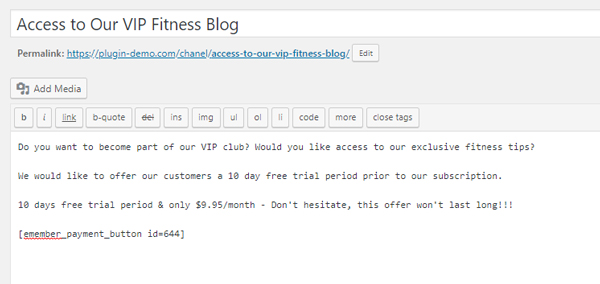
You can now use the button shortcode to embed this payment button on a post or page. You will need to explain the terms of this subscription on the page above or below the subscription button (see example below).

Customers who proceed to checkout with PayPal will see ‘terms’ similar to the example below:

Option 2: Offering One Standalone Free Trial
Offering a standalone free membership means you will give your customers free access to your website for a set amount of time. This option does not include charging your customers after the free membership ends. Free trial customers will need to return to your site and then purchase a paid membership.
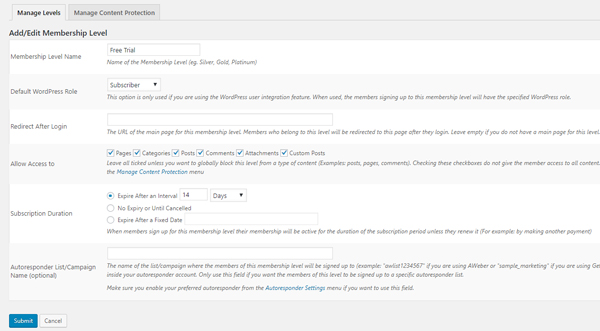
- Create a membership level. You may wish to title this membership level: Free Trial Membership.
- In the ‘Subscription Duration’ section of the ‘Membership Level’ decide on the length of the free trial you will offer your customers. For this example, I will set my membership level expiry to 14 days. This means after 14 days my customers will no longer have access to my website.
- Take note of the level ID of the free trial level.
- Click on the ‘Settings‘ menu of ‘WP eMember’.
- Check the ‘Allow Free Membership‘ field.
- In the ‘Free Membership Level ID‘ field, enter in the ID of your free trial period.
- You can now use the standard registration page (that is generated on installation of this plugin) to offer the free trial period to your customers. They will be able to register for free and their account will expire after the time you have set in the ‘Subscription Duration’ field.

Leave a Reply